English
 Español
 Português
 Русский
 Deutsch
 Francés
 العربية
 한국어
한국어
 Türk
Türk
 日本語
日本語

What Should Operators Check When Changing Drums on a Two-Component Sealant Extruder?
What Should Operators Check When Changing Drums on a Two-Component Sealant Extruder?
After changing an A-component or B-component drum, do not return the two-component sealant extruder directly to full production. Confirm the material identity and condition, install the container according to the equipment and sealant instructions, remove trapped air using the approved procedure, and verify that both components feed and mix correctly. Produce an identified test sample and complete the required ratio, mixing and curing checks before releasing the next IGU order.
The correct mixing ratio, purge quantity, air-exposure limit and acceptance test depend on the sealant. They should never be guessed from another factory’s settings.
A Drum Change Is More Than a Material Refill
Changing a drum interrupts the material supply system. The follower plate moves, a container is opened and one component may be exposed to the surrounding air. A small amount of air can also enter between the material surface and the pump inlet if the new container is not installed correctly.
The machine may restart and dispense material even when the process is not yet stable. The first output can contain air, unmixed material or residue left in the mixer. A smooth-looking seal on the glass edge does not prove that the two components were supplied in the correct condition.
This is why the drum change should be treated as a controlled production change rather than a routine refill.
Check the New Material Before Opening It
Start with the container labels. Confirm:
Manufacturer and product name
A-component or B-component identity
Batch or lot number
Expiry or use-by information
Package size
Storage condition
Visible container damage
Compatibility with the material already connected to the machine
Do not connect a product because its colour and container size appear correct. Different sealant grades can require different mixing ratios, processing conditions and quality checks.
Check whether the sealant supplier requires the two components to come from matched batches. Some systems do not require batch matching, while others may have specific controls. Follow the current technical data sheet rather than creating a factory-wide assumption.
Prepare the Equipment Safely
Stop the equipment and follow its operating manual before moving a pump, follower plate, hose or material container. Only trained personnel should perform the change.
Clean the accessible contact area using the approved method. Old material around a follower-plate seal can prevent it from seating correctly. Dirt or cured residue may also enter the new drum during installation.
Do not use an unsuitable solvent, metal scraper or compressed air simply because it is available beside the machine. Cleaning products and tools must be compatible with the sealant and equipment.
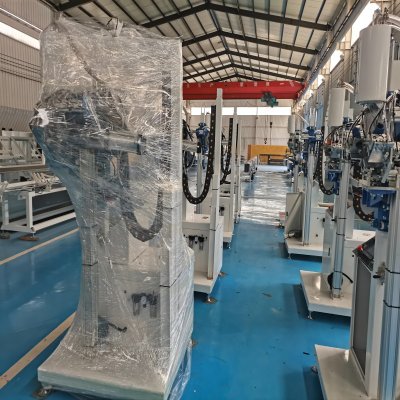
The JINJIYE two-component sealant extruder uses separate material supplies and a mixing system. The exact drum-change sequence still depends on the selected machine configuration and sealant.
Reduce the Risk of Trapped Air
Open the new container only when the equipment is ready to receive it. Follow the sealant supplier’s instructions for removing protective films, surface material or packaging.
Some curing components are sensitive to atmospheric moisture and should not remain exposed longer than permitted by their manufacturer. Prepare the tools and machine position before opening the container instead of leaving it uncovered while the equipment is cleaned.
Position the drum correctly beneath the pump. Lower the follower plate according to the machine manual and use the approved venting procedure. The objective is to seat the plate against the material without leaving an air pocket.
Never place hands between the follower plate and container. Do not bypass a guard, valve or interlock to speed up the operation.
Re-Establish Both Material Flows
After installation, confirm that the changed component reaches the pump and material line consistently. Use only the priming or purging sequence specified by the equipment and sealant suppliers.
Do not increase pressure simply to push an air pocket through the system. Excessive pressure can create another process problem and does not confirm that the material supply has become stable.
Observe the output safely. The following signs require further inspection:
| Observation after the change | First areas to review |
|---|---|
| Material spits or contains bubbles | Trapped air, follower-plate seating, container installation and material supply |
| Repeated light or dark streaks | Component supply, mixer condition and mixing consistency |
| Output pressure fluctuates | Pump supply, air source, follower plate and drum condition |
| Sealant remains soft or cures abnormally | Product identity, mixing ratio and supplier-defined curing check |
| Cured particles appear in fresh material | Mixer condition, permitted mixer open time and cleaning procedure |
These signs narrow the inspection but do not establish a final diagnosis. Record what happened before adjusting the machine.
Verify the Mixing Process Before Sealing Production Units
The correct verification method comes from the sealant supplier and the factory’s approved quality procedure. Depending on the product, it may include:
Measuring the component ratio
Checking colour and mixing uniformity
Performing a supplier-approved butterfly or mixing test
Checking pot life or snap time
Inspecting the output for trapped air
Producing a sealant adhesion or curing sample
Recording ambient and material conditions
Do not judge the mixture only by colour. A visually uniform bead can still have the wrong ratio or unsuitable curing behaviour.
Likewise, do not change the ratio only because one sample appears to cure slowly. Temperature, material age, test method and timing may also affect the observation. Compare the result with the current technical data sheet and the factory’s approved reference.
Seal and Identify a Test Unit
Before releasing the next batch, apply the mixed sealant to an identified test piece or representative IGU according to the factory procedure.
Record which drum was changed, the material batch, the time of the change, the operator, the initial observation and the tests completed. Keep the sample for the period required by the factory’s quality system.
The first production unit should remain traceable to the changeover. If a problem appears later, the team can determine whether it began before or after the new drum was installed.
Do Not Release Production on Appearance Alone
A clean surface is useful, but secondary sealing quality depends on more than appearance. The mixture must receive the checks required for the actual sealant and certified IGU construction.
The broader article on secondary sealing bottlenecks explains how unstable material supply can slow the entire IGU process. Excessive purging and failed test units can also increase the sealant waste produced by an IGU factory.
A short controlled check after every drum change is easier to manage than removing incorrectly mixed sealant from a complete production batch.
Keep a Simple Drum-Change Record
The record does not need to be complicated. Include:
Date and time
Machine identification
Component changed
Old and new batch numbers
Sealant product name
Operator
Approved setup used
Purging or priming completed
Mixing or ratio test result
Curing-test result
First accepted production unit
Do not overwrite the original observation when an adjustment is made. Record the adjustment separately so that maintenance and quality personnel can see what changed.
What Buyers Should Ask About the Machine
When comparing two-component sealant equipment, ask the supplier to demonstrate a real drum change instead of showing only continuous dispensing.
Confirm:
How the follower plates are raised, lowered and vented
How A- and B-component supplies are monitored
How mixing ratio is set and checked
How the mixer is cleaned or replaced
Which alarms indicate an empty drum or unstable supply
How pressure is relieved safely
Which seals, filters and mixer parts are considered consumables
What operator training is included
Use the sealant intended for production when possible. A test performed with another material cannot confirm the exact setup required for the buyer’s product.
Frequently Asked Questions
Must both drums be changed at the same time?
Not necessarily. This depends on material consumption, packaging and the sealant system. Each change should remain traceable, even when only one component is replaced.
Can the old and new material batches be mixed?
Do not assume they can. Follow the sealant manufacturer’s batch and compatibility instructions. Keep the old and new batch numbers in the changeover record.
Why does the extruder spit after changing a drum?
Air may have entered during installation, or the follower plate may not be seated correctly. Stop and follow the approved inspection and venting procedure rather than increasing pressure blindly.
Can operators determine the correct ratio from the sealant colour?
No. Colour can reveal obvious mixing problems, but it does not replace the supplier-approved ratio and curing checks.
When can full production restart?
Restart only after material flow is stable and every required changeover test has passed. The release criteria must come from the factory’s quality procedure and the sealant supplier.
Make Every Drum Change Traceable
A successful drum change leaves three things: stable material flow, an accepted quality test and a clear record. If one of these is missing, the factory cannot be certain that the secondary sealing process has returned to its approved condition.
For equipment selection or troubleshooting, send JINJIYE the machine model, sealant product, drum sizes, mixing requirements and a safely recorded video through the contact page.